Point of Sale Campaigns
If you are looking to sell items, such as cards or merchandise, online, you can do so with a Point of Sale Campaign.
Begin as you would normally, setting up your campaign.
After giving your campaign a name and description, adjust the toggle for Campaign Type to PointOfSale –
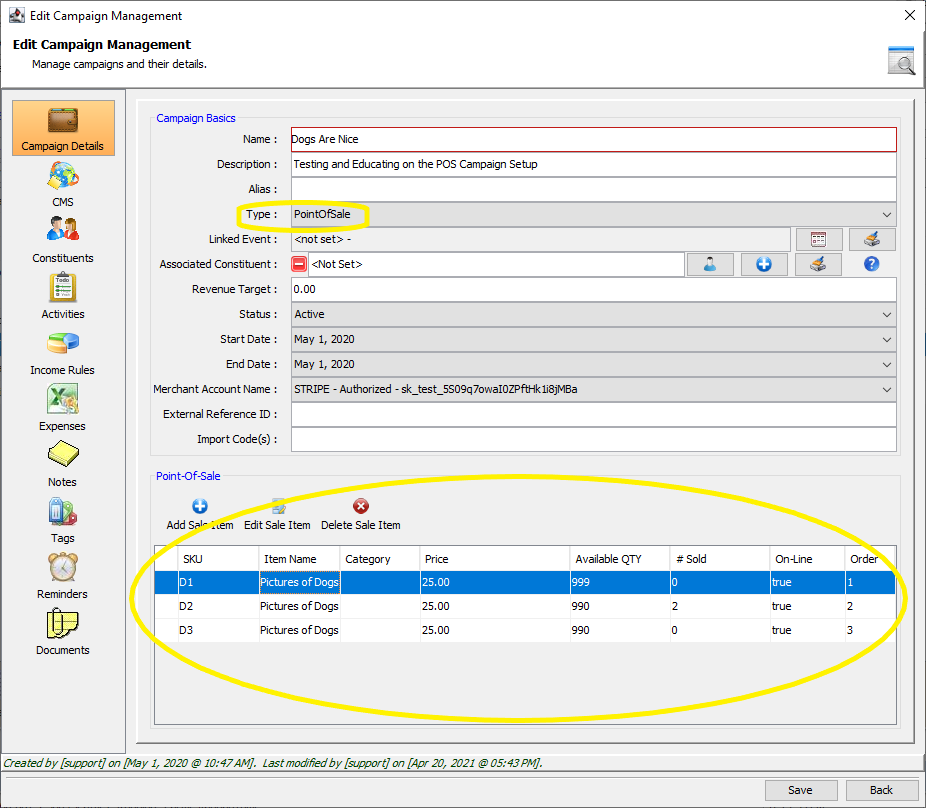
Selecting Add Sale Item will open the Campaign Point-of-Sale Product Wizard –

Input the Item Name, a Tag Line, set the Item Cost and Quantity available. The Display Order will determine the order in which items are listed in portal, and the SKU Number is of benefit when exporting and reporting data later. When information is entered, the Alert Icon becomes a Complete Icon, and you can select the next point to continue.
The Product/Item Description is a rich-text editor, and appears in portal in a tab next to the Product/Item Restrictions, if you have any.
The Item Image will appear as a thumbnail in the portal to let purchasers see what you are selling.
Add as many items as you need!
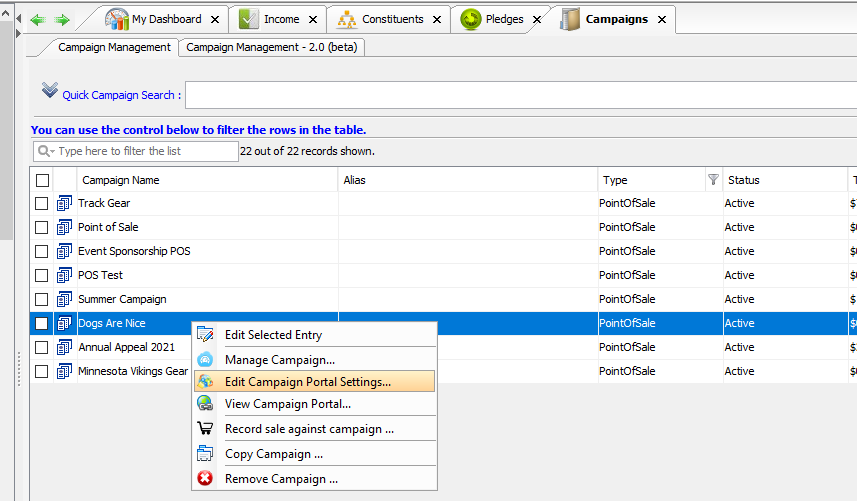
After saving, you can work on your Campaign Portal Settings with a right-click from your newly created Campaign record, selecting Edit Campaign Portal Settings –
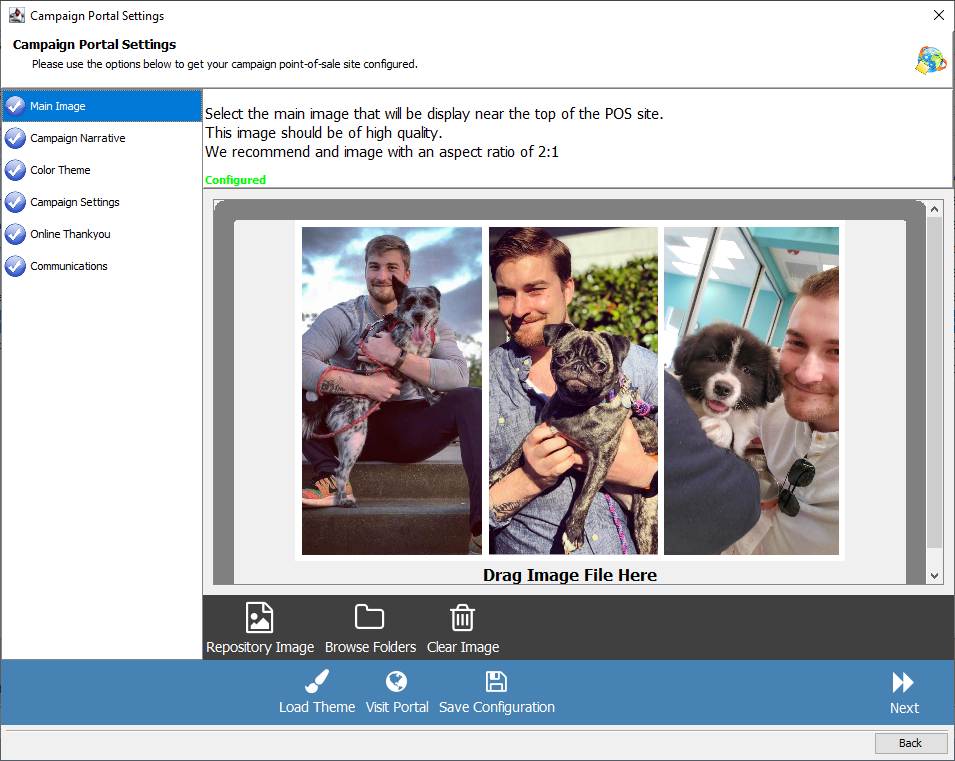
This brings up the Campaign Portal Settings Wizard, where you can set your Main Image, your Campaign Narrative, Color Theme, general Campaign Settings (like Purchaser and Payment Options), your Online Thank You message, and Communications, where you can set your Confirmation Email and set a staff member to receive notifications.
After Saving your Configuration, you can review your portal with a right-click on the Campaign list by selecting View Campaign Portal or by selecting Visit Portal in the Wizard.
In the Portal, your Main Image appears at the Top-Right corner, the Campaign Narrative will appear at the top, and your Sale Items will be available at the bottom –

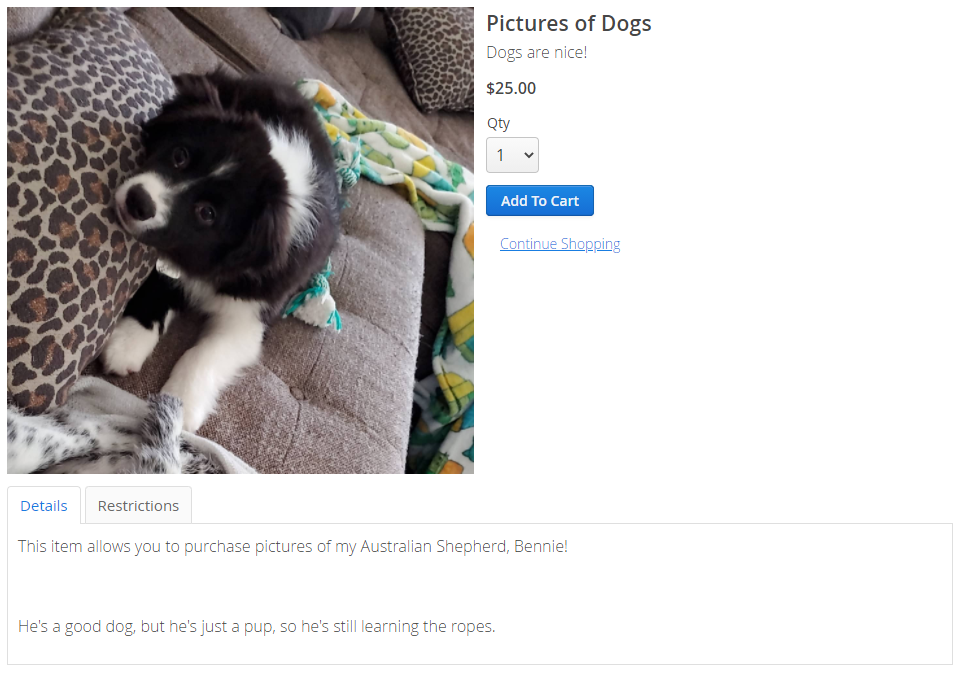
By selecting See Details, your purchasers will be able make their purchase, view a larger image of the product, read the details, and review any restrictions the item may have.
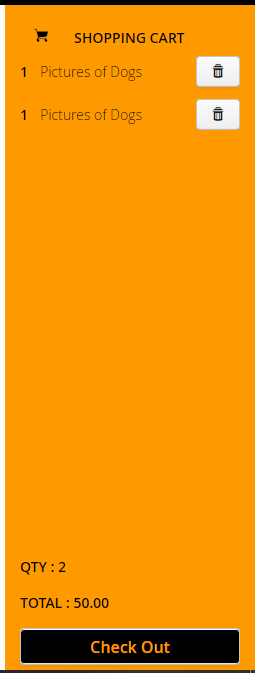
If items are added to the cart, the sales will be visible in the Shopping Cart to the right of the window, where they can then check out –
From the back end, within Compass, in your Campaign Dashboard, you can review your inventory and quantity sold –

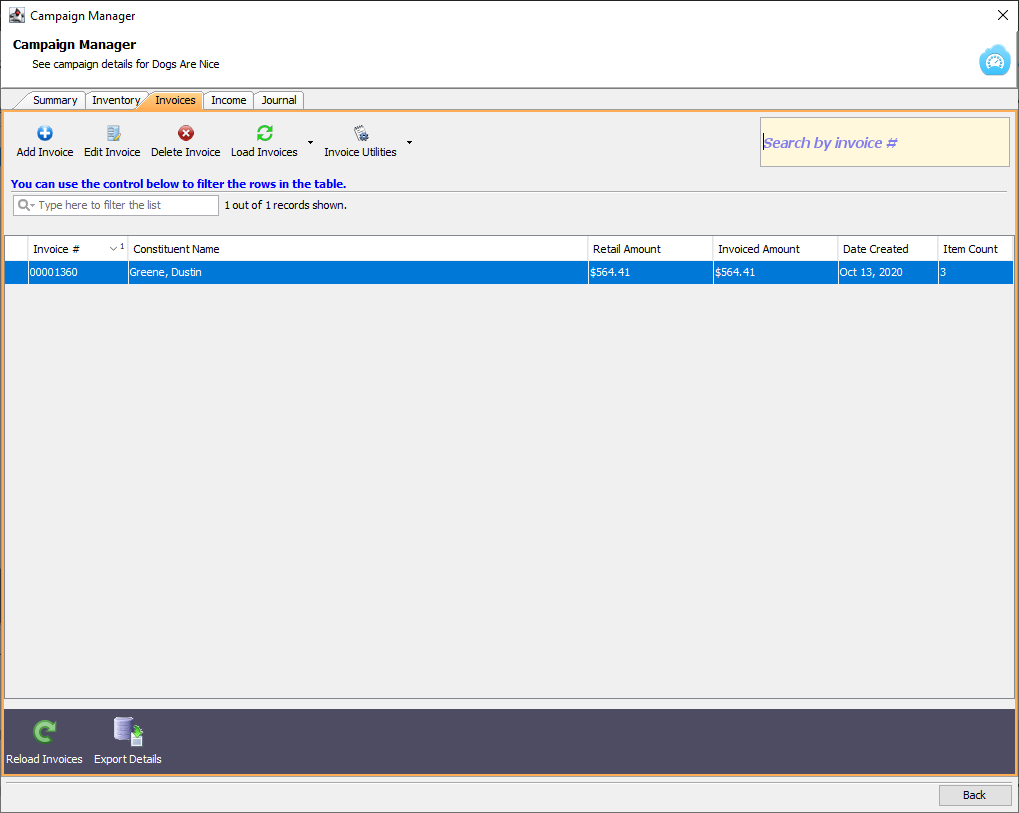
And from Invoices, you can match pending sales, export data, and adjust invoice details as needed –
If you find yourself with any questions, please do not hesitate to reach out to our Support Team at
Help@Compass-360.org!