Create a Questionnaire
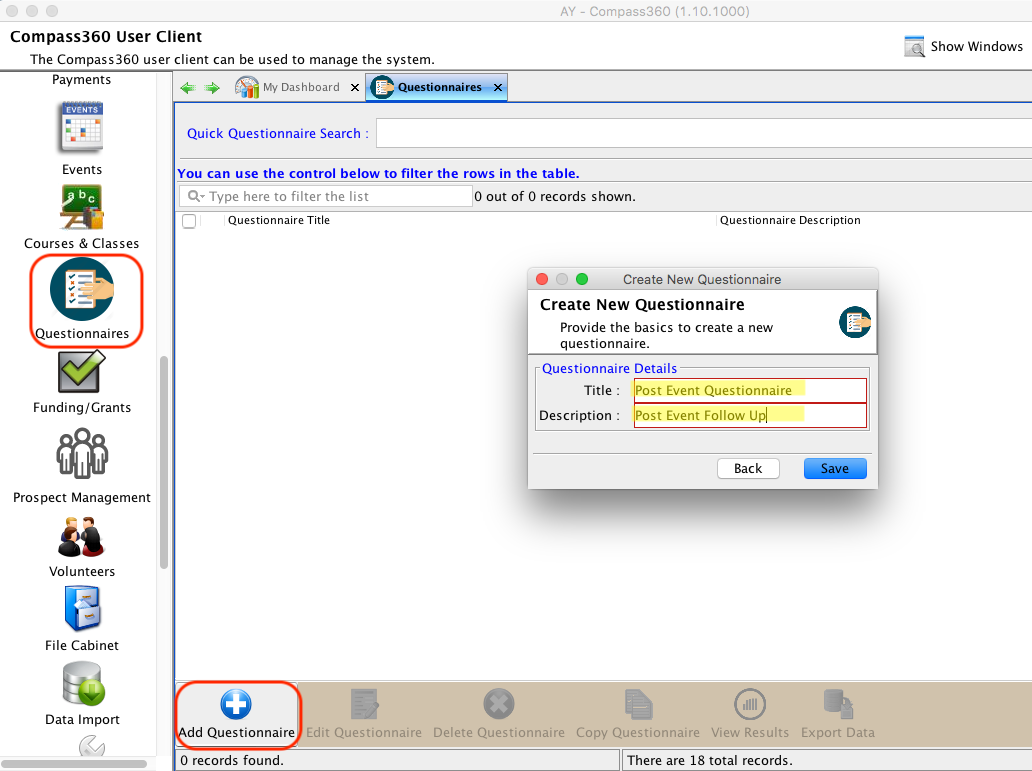
- Head to the Questionnaire Module and click Add Questionnaire. You can load current questionnaires by clicking on the
icon in the top right, next to the search function.
- Give your questionnaire a ‘Title’ and ‘Description.’ Click Save.

Tip: Need a new questionnaire with the same fields from a pre-existing questionnaire? Select the pre-existing questionnaire and from the bottom bar, select Copy Questionnaire. A window nearly identical to creating a new questionnaire will open and again ask for a Title and Description. Enter and click Save.
A new questionnaire, identical to the copied one, is now created. Update as needed!
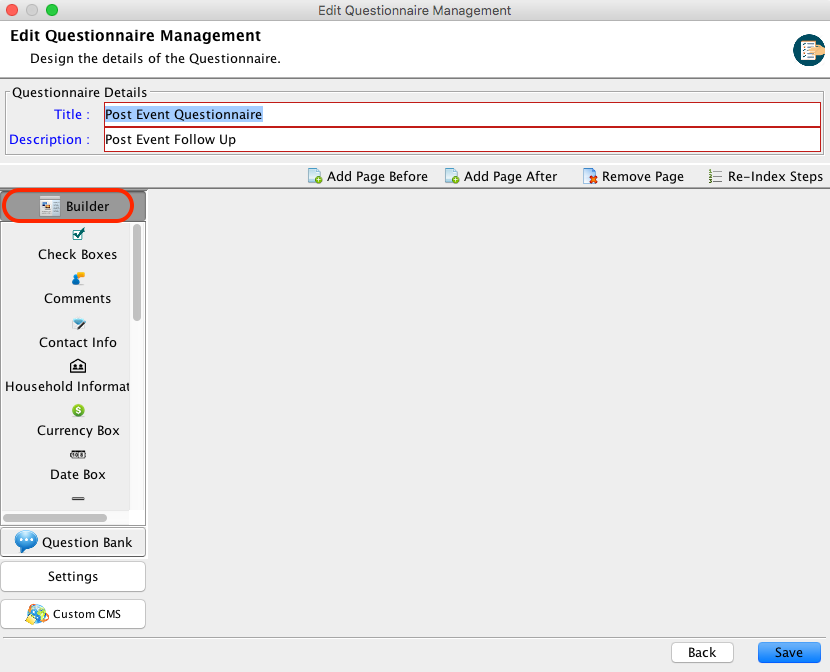
- Once you have added the questionnaire, it will appear on the list of questionnaires. Right click and selected ‘Edit Selected Entry’ or select Edit Questionnaire from the bottom bar to configure the various questions using the Builder.

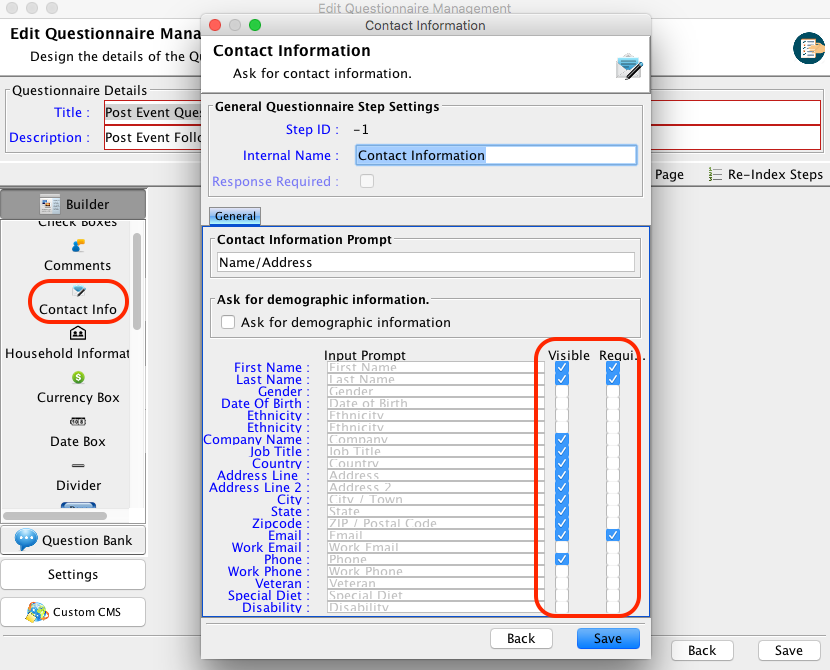
- From the builder, click on the question type that you would like to add. For example, you will typically want to add a question to gather contact information for the constituent filling you the questionnaire. Click on the Contact Info button in the Builder section. You will then be able to select which Contact info you would like to collect. You can select which items to make ‘Visible’ on the questionnaire, and which items you’d like to make ‘Required.’
Tip: Use the ‘Internal Name’ field to customize the column titles that will appear when questionnaire results are exported into an Excel file.

- You can continue to add additional question types, until you have asked all of the questions you would like to include in your questionnaire. Additionally, you can add an intro message or text to your survey at any point by adding an ‘Intro Message’ or ‘Text Block.’ You can also add files and images to the survey, accept a payment, or request a signature. Click here to learn more about the various question options.
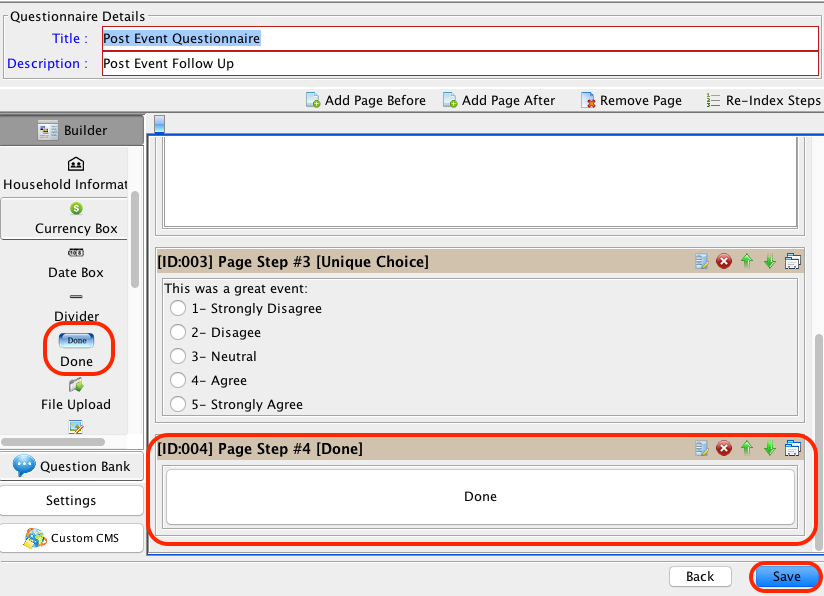
- When you have finished adding all the necessary questions to your questionnaire, be sure to add a Done button as the last entry on the questionnaire.
- Finally, select Save!
