Providing Service to your Clients
After setting up your users, Intake Questionnaire, Service Locations and Service Areas, you can begin to provide services to your clients.
- Login to your Community Service module. Read these articles for more information on setting up Community Service users and accessing the Community Service Portal.
- Click Launch in the Client Services section.
- On the Client Service module, you will see a Check In Queue and an area for each Service Area that you have added.
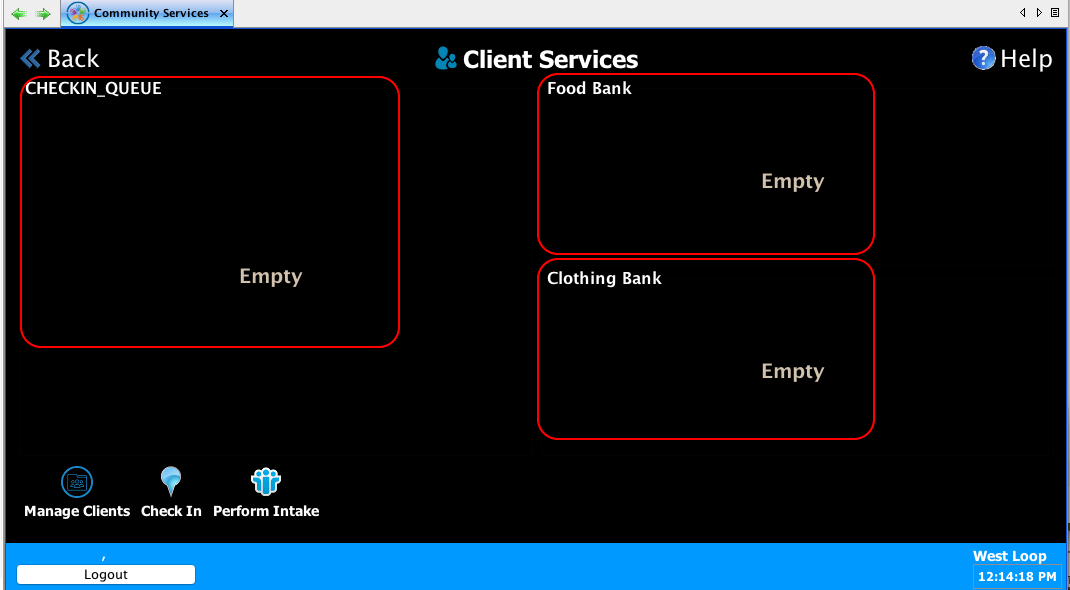
- You will also see three icons on the lower left

Manage Clients
When you click on the Manage Clients button, you will be able to search your Case Files to review the details on the household members in the Case File and recorded visits. Case Files will typically be created when you walk a new client through their intake questionnaire. Use the Options menu to change the Case File status to Active if the client is able to receive services.
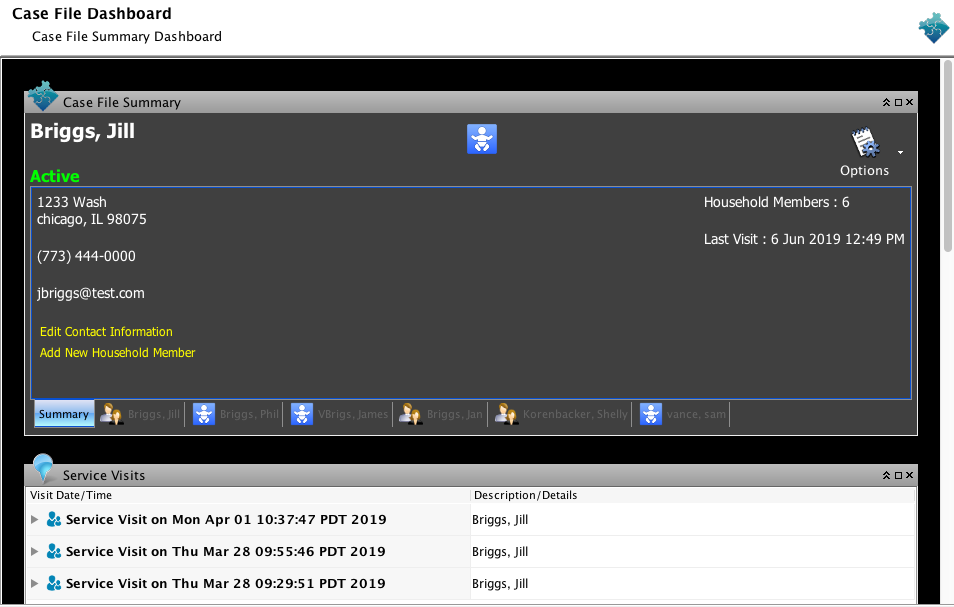
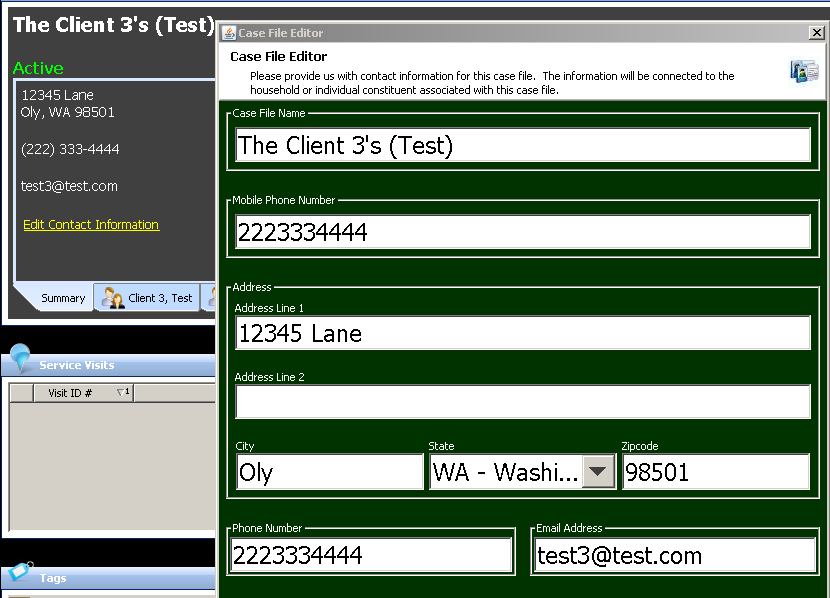
The Summary Tab shows the general contact details on file for that household. Here you can edit the household contact information.
Click on any of the members of the household for additional information on that member.
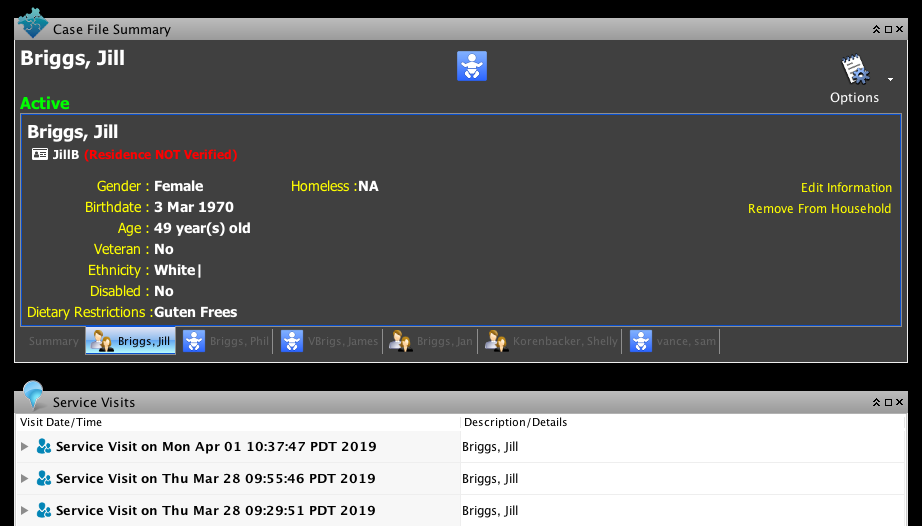
Click the Edit Information link for additional information on each member of the household.
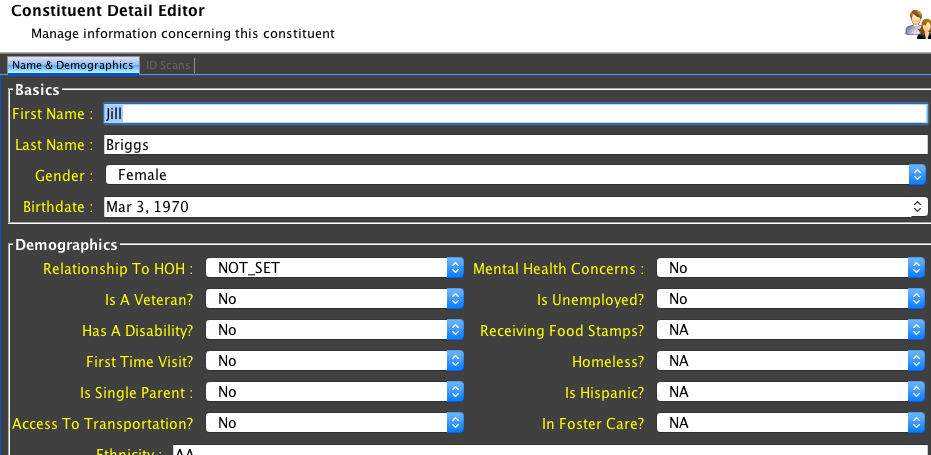
And on the ID Scans tab, you can enter an ID that you can use when checking this client in for service.

Additional Details Tracked with a Case File
The Case File dashboard displays the following additional information
Service Visits
Shows the history of all visits associated with this case file that have been tracked by Compass-360.
Tags
Allows you to track additional details associated with a Case File and collected during an intake/ application.
Questionnaires
Maintains a history of all questionnaires (i.e. applications) that have been completed by this household through Compass-360.
Notes
Allows case managers to add details from client visits / conversations to the case file.
Reminders
Assign reminders to team members and yourself about case file records.
Documents
Store documents that are relevant to the case file.
Check In
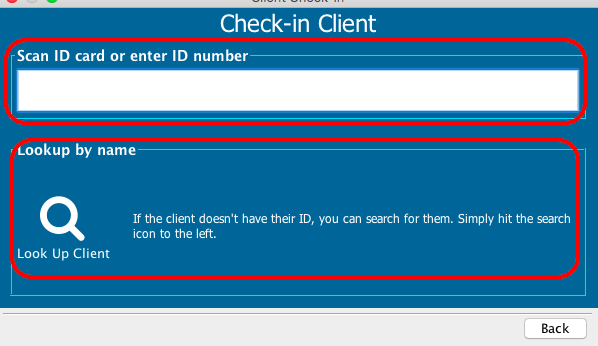
Use the check in button to check your clients into your service queue. You can scan an id card, enter the ID number for the guest you would like to check in, or search for the client by name.
Perform Intake
If you have setup an intake questionnaire, you can walk the client through the intake questionnaire by clicking on the Perform Intake button.
Provide a Service
When clients show up at your location, you can check them in and provide services.
The initial client service screen will show an active check-in queue on the left hand side, and the Service Areas that have been defined in the Site Setup section for the location on the right hand side.
- Click the Check In icon to check your clients in for service. You can check in your clients by name or by the ID you set up for them.
- Once the client is checked in, you will see that they appear in the Checkin Queue column.
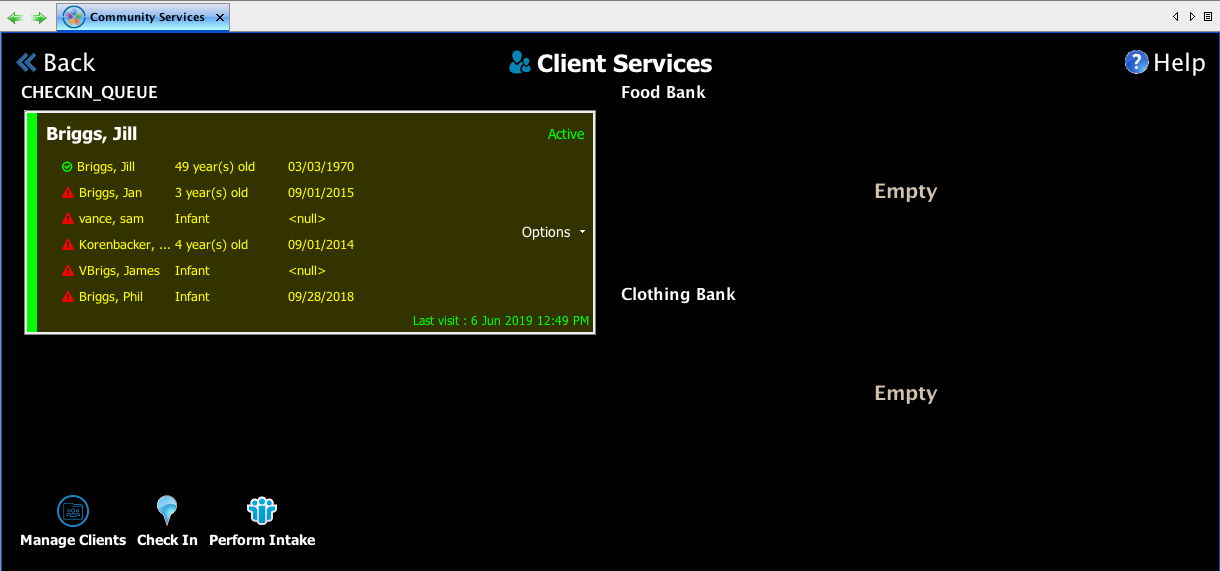
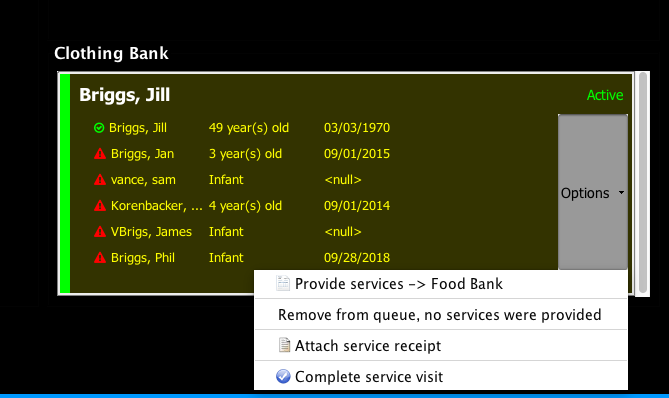
- Click the Options menu to select what type of Service Area you want to provide for this client.
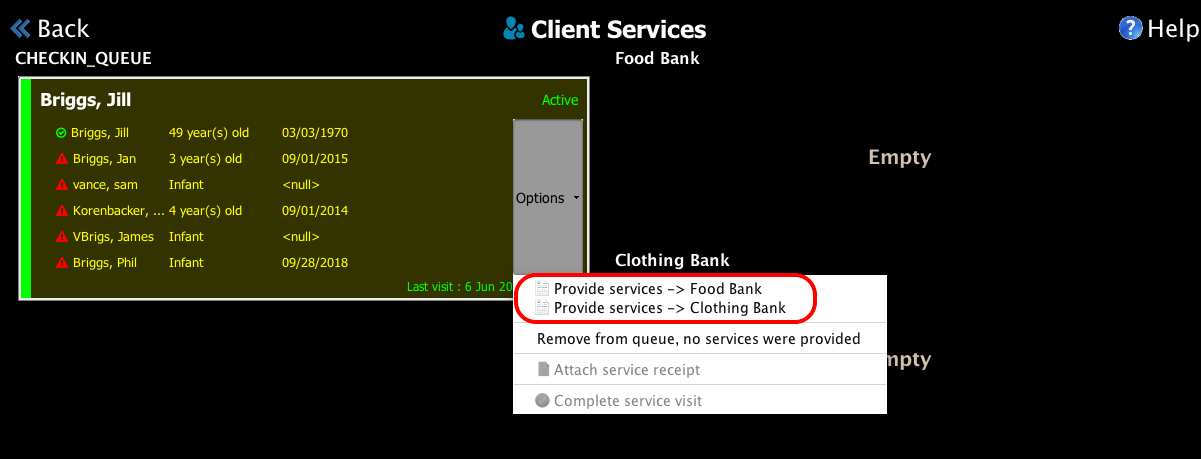
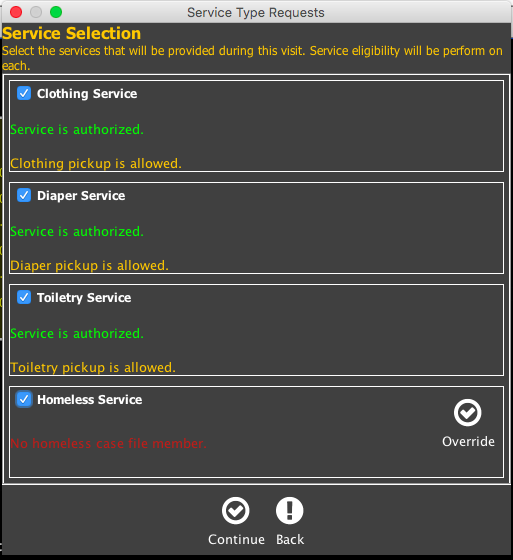
- Select the specific Services you would like to provide from within that Service Area. If you have it setup so that Comapss-360 will validate that service is available to each client by checking their age, zip code, etc, you will be notified if service has been approved or denied for each service. Click Continue.
- If service was available to that client, the client will appear in the appropriate service queue. Click the Options menu to move the client to a different service area queue, remove the client from the service queue without providing service, or to complete the service visit which will create a service visit record.
