Guest Self-Management
You can give your guests the ability to access an Event Guest Portal, which they can use to manage their information, vault a credit card, manage any guests they’ve invited, and view/pay a receipt or invoice.
Important to note:
At any point, you can access any attendee’s portal by right-clicking on their name from the Guest List in the Manage tab of the Event. At the bottom of the options, select Visit Guest Portal…
The Event Guest Portal
There are a handful of things your attendees can do within their Event Guest Portal. At first, they’ll see their Guest Details and Contact Information.

Next, if there is a questionnaire attached to the event, they’ll see their Questionnaire/Survey section. If not questionnaire is attached, it won’t appear.
Below, they’ll be able to manage their vaulted credit card and any other attendees which they purchased a ticket on behalf of.

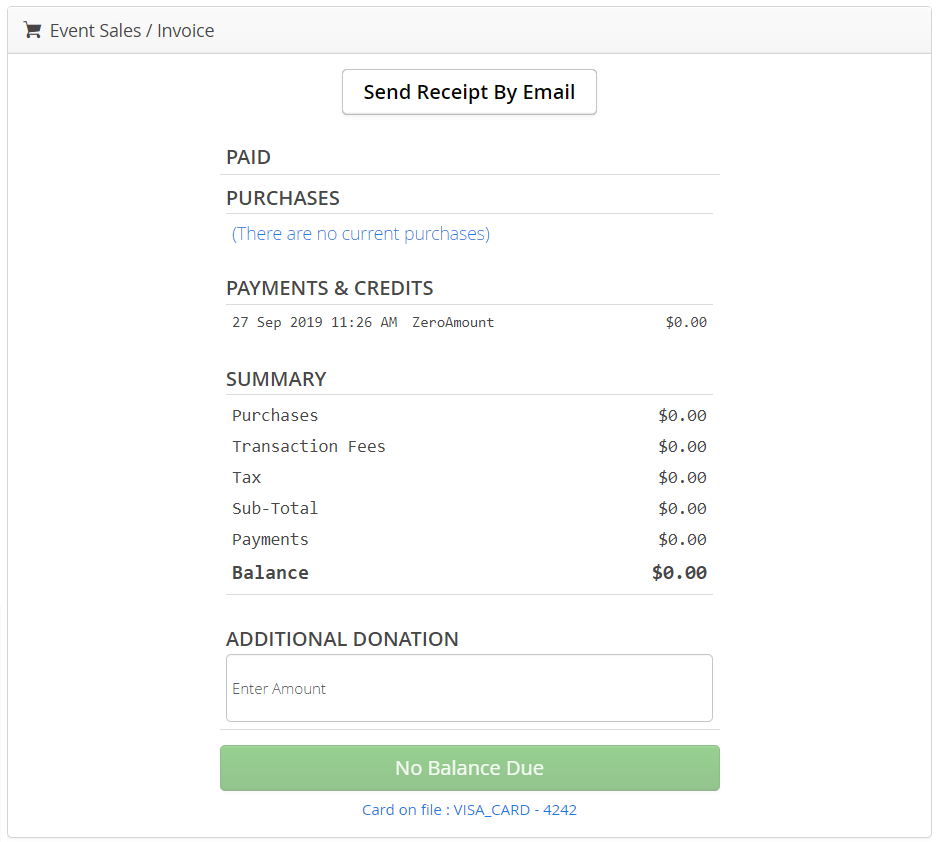
Lastly, they’ll be able to view all of the items/tickets/donations they purchased and any payments made toward to their total. They can also make payments and additional donations, as well as send themselves a receipt (as long as it is configured.)

Configuring
There is minimal configuring need with the Event Guest Portal. To utilize the Event Guest Portal functionality, you must first enable it within the event. In the Event, from the Configuration tab, scroll to Tables & Seating. From the options, select the Enable Guest Self-Management box:

Important to note:
To close the Event Guest Portals, unselect this box. The Portal Closed message (addressed below) will appear if a guest tries to access it after you have closed it.
Hiding Details
At the top of the Event Guest Portal is the attendee’s event details, including their bidder number, table assignment, captain, sponsor, meal choice and special instructions:

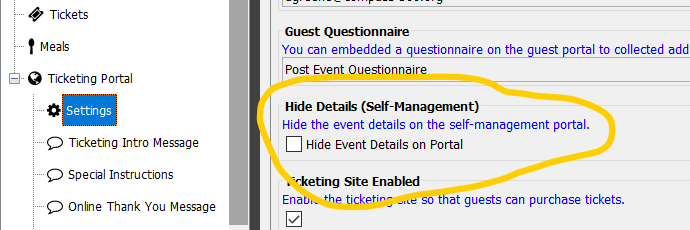
You can hide these details. In the Event, from the Configuration tab, scroll to the Ticketing Portal Settings. From the options, select the Hide Event Details on Portal box.

At any point, you an enable them by unselecting the box.
Greetings & Messages
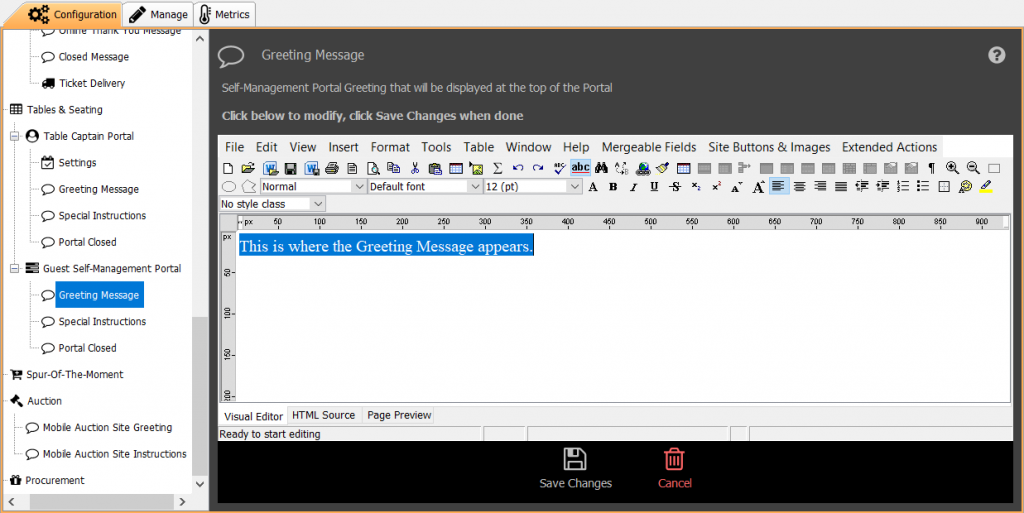
In the Event, from the Configuration tab, scroll to Guest Self-Management Portal to configure a customized Greeting Message that your guests will see when they are in their Event Guest Portal.

You can can customize the greeting message to include anything from instructions, details about the event, or any message that you want your guests to see when they first land on their portal.

You can also configure a Portal Closed message. This is the message that will appear if someone tries to access the Event Guest Portal once you have closed it.
Important to note:
We are deprecating the Special Instructions configuration, any instructions should be included in the Greeting Message.
Emailing Guests Access
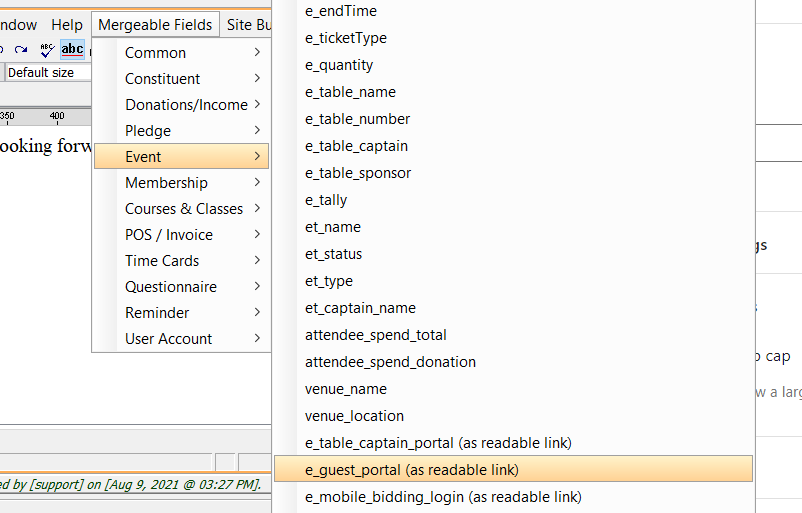
You can give an attendee access to their Event Guest Portal by using the Mergeable Field e_guest_portal (as readable link) in any email. This must be selected from within the email asset.

Once you have dropped the Mergable Field into the email asset, you’ll have the opportunity to change the name. It it a unique link and will adjust to direct each attendee to their own unique portal.
Important to note:
There is no such thing as overcommunicating. We recommend including the Event Guest Portal in almost all communications to event guests.