Defining and Managing Auto Allocation Rules
You can establish master rules for Compass-360 to follow for income that is received through various Compass-360 online portals (i.g. online donation, event specific donations, etc.)
Important to note:
Setting auto allocation rules is both an advanced and optional configuration.
In the Income Module > Income Management tab, select the Funding Needs button from the bottom bar.

Important to note:
Funding Needs options will be greyed until you select a year or fund.
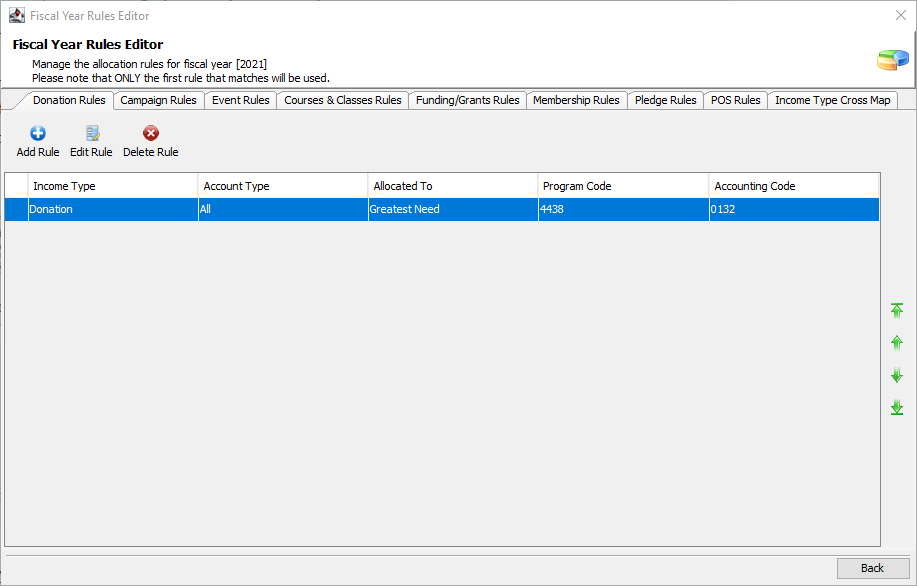
First, select the fiscal year you are establishing an auto allocation rule for. You must set auto allocations per fiscal year. Once selected, click the Manage Rules button from the bottom bar to open the Fiscal Year Rules Editor:

Across the top, you’ll see the various modules that accept income.
Important to note:
You can also establish rules on a per activity basis rather than at a master level.
Select the Add Rule button to open a third window and define the Auto Allocation Settings.

Fields
Income Type
Select the type of income that you want to auto allocate: Donation, InKind, Grant, Sale, Bequest, Lifetime, Pending, MembershipDues, BoardDues, SoftCredit, Adjustment, Business Sponsorships, Sponsorship, Test, Payable.
Account Type
Choose the constituent type for that income: Corporation, Household, Individual, Organization, School, Unknown.
Allocated to
Select the icon to open up your fund allocation and select the appropriate fund to which to allocate this specific income activity. Compass-360 will automatically populate the Program and Accounting Code fields based on the information pulled from the fund you have chosen.
Repeat this process for each income parameter that you want Compass-360 to auto allocate.
Note: Compass-360 cannot automatically manage multiple allocations for a single income record. These will need to be manually created.