Moves Management
Project, track and report on your major gifts (or any demographic strategy) using the Moves Management tool in the Constituent Module.
Building a Life Cycle
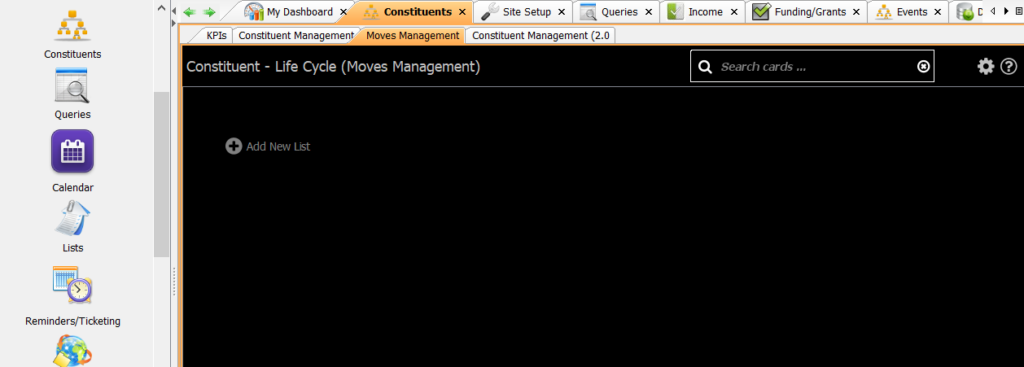
Commonly referred to as a ‘board’ – the constituent “life cycle” at first appears empty with the ability to add ‘lists.’ Begin by mapping out the linear life cycle of your development strategy. Select Add New List and add each level of your strategy.
Important to note:
List names are completely customizable and can be built to reflect your organization’s donor strategy, whether it be for major gifts, retention, growth, etc. The board and accompanying report is intended to be built and read linear, from left to right.
At this time there is only one board currently available.
There is no limit to to how many lists you can have on your board. Scroll using the bottom bar to see more lists or add a new one.
Tip: You can reorder your lists by dragging and dropping. Select any part of the grey outline and drag to where you want to drop the list. A red line will appear, indicating it can be dropped.
Anatomy of a List
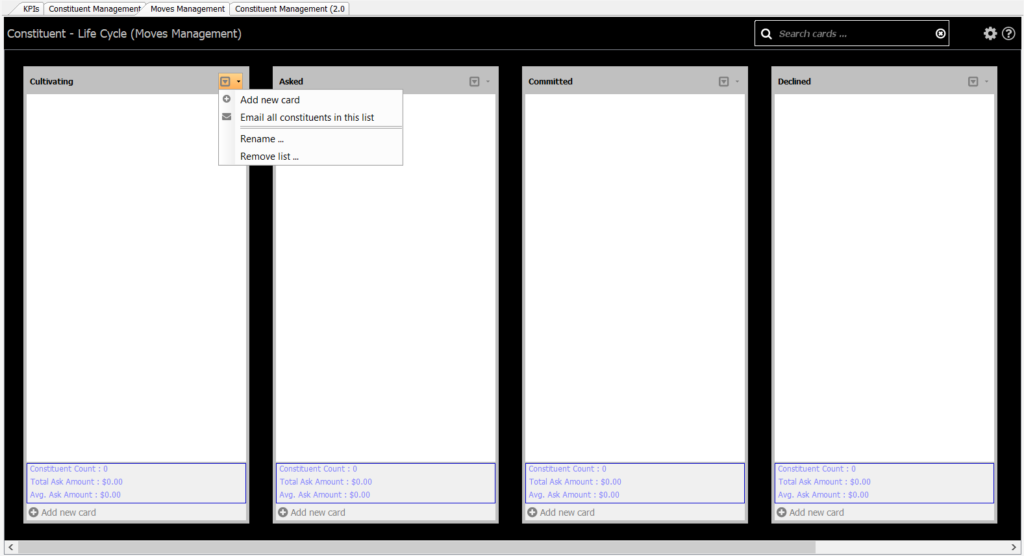
Once you’ve defined and set up your life cycle, you’ll populate the lists with constituent ‘cards.’ Notice the summary totals at the bottom of each list – they will begin to update as you add cards to each list.
Cards are attached to a constituent record and are used to move your constituent through the life cycle of lists. You can add a card from the bottom of the list or by selecting the arrow box in the right corner of the list.
From either option, select Add new card. A window will open. First select a constituent to attach to the card.
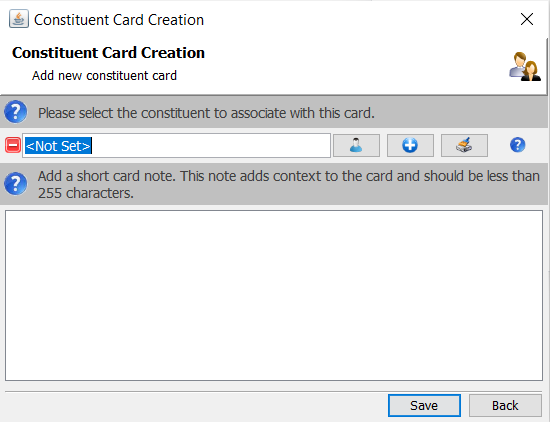
You can also add a ‘short note’ to the card. This is a high-level, optional note that will be readable from the board-view. You’ll have the ability to add more detailed notes later during configuration of the card.
Once saved, a blue card will populate on the list. The summary totals at the bottom of each list will begin to populate and update as more cards are added.
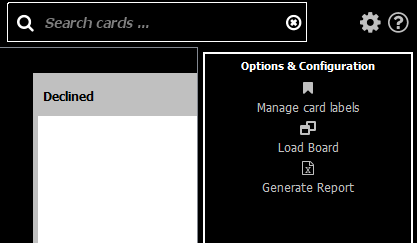
Tip: If at any point information is not automatically updating, select the wheel at the top right corner of the board to reveal the Options & Configuration. Update the board by selecting Load Board.
All About Cards
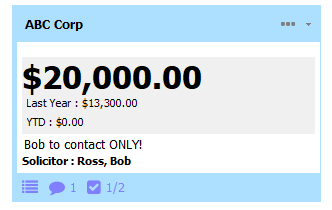
Cards are the heart of Moves Management and allow you to project, track and report on your gift strategy. From the board-view, you’ll see the constituent name in the blue outline of a card, as well as three dots. Selecting the three dots will open the card management.
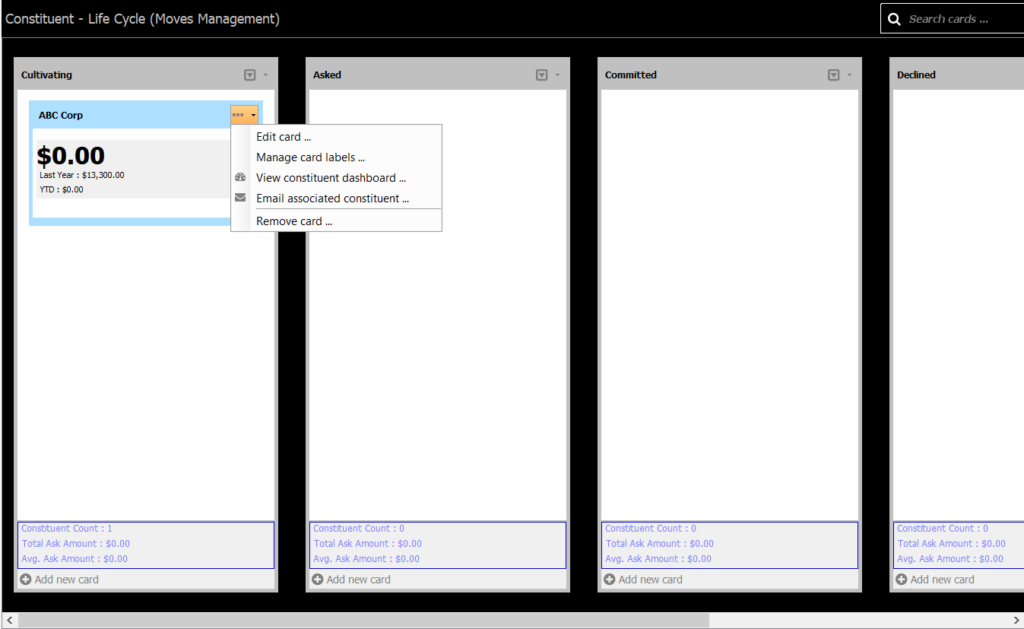
Additionally, from the board-view, you’ll be able to see the constituent’s projected ask (the big, bold $0.00), their Last Year gift and their YTD. If you added a short note, it will appear in the white space underneath the income summary.
By selecting the three dots, you’ll see the various options to manage the card. To add detail and finish configuring, select Edit card… This will open a new window: Constituent Card Manager.
Enter the Ask Amount – this is the projected amount you will be asking the constituent (and thus tracking.) It appears from the board-view as the big, bold $0.00 until set.
Beneath you’ll see a quick summary of the constituent’s giving history, including any income attached to the constituent record Year-to-Date. This will automatically update as income is recorded to the constituent.
Enter the Projected Date – this is the date you expect to have the ask completed by. This is optional.
Enter a Solicitor – this is the “manager” of the constituent, who typically manages the relationship and will be making the ask.
The Description will be auto-populated if you entered a high-level short note when creating a card. You can edit or remove it here.
For detailed notes, you’ll use Activities. Here you can enter anything relevant to the card, the ask, or the life cycle that needs to be tracked. Activities will populate with the most recent at the top, descending to older noted Activities. It will also track the user who entered the Activity and on what time and day.
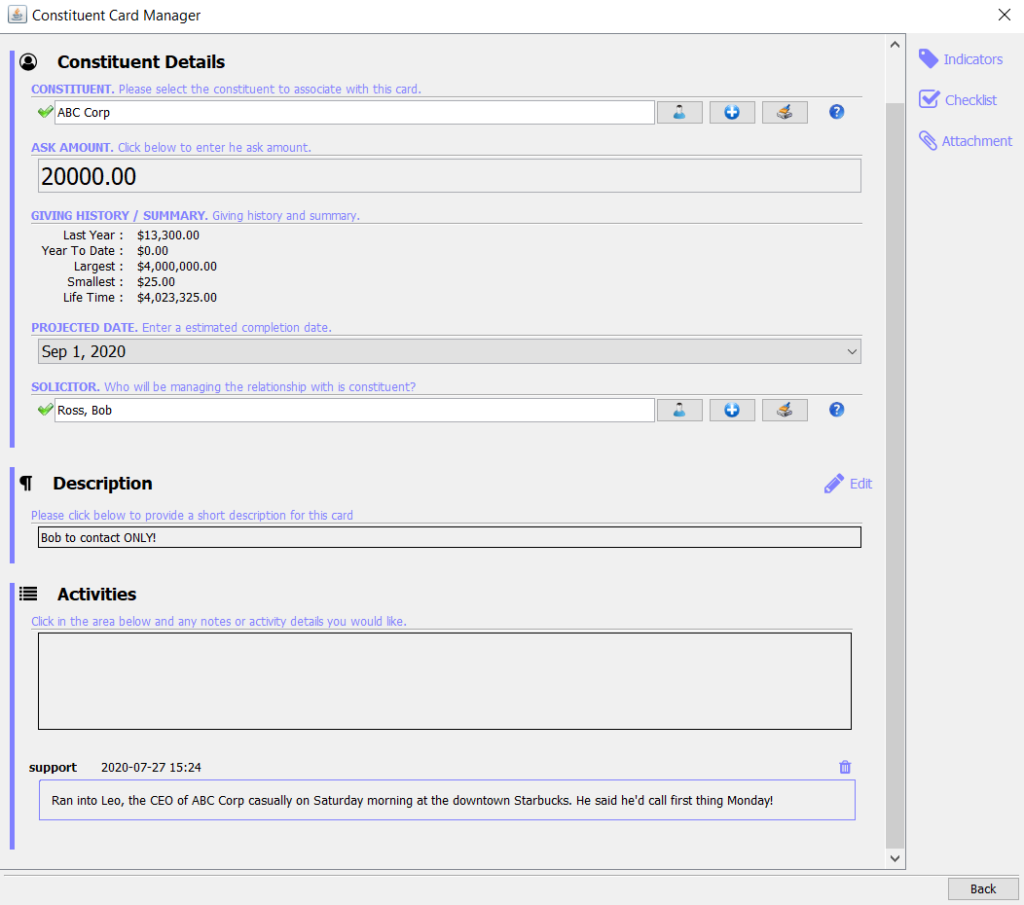
On the right side, you’ll see Indicators, Checklist and Attachment.
Indicators
You manage unique demographics of data points of your cards by using Indicators: color-coded “labels” that can be attached to a card. When an indicator is attached to a card, it will appear from the board-view and can help visually differentiate donors.
Tip: You can edit Indicators by selecting the wheel at the top right corner of the board to reveal the Options & Configuration.
Checklist
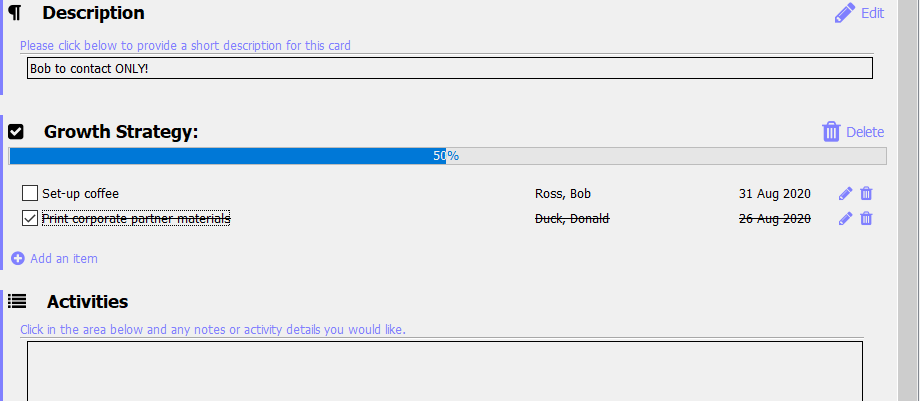
In addition to the card details, you can also add a Checklist (or two!) to a card. This is where you can create and track specific touchpoints, assign tasks to staff, and manage reminders.
Select Checklist from the sidebar. Enter the name of the checklist and click Save. The new checklist will appear underneath Description on the card details. Select Add an item to open the window to add a task.
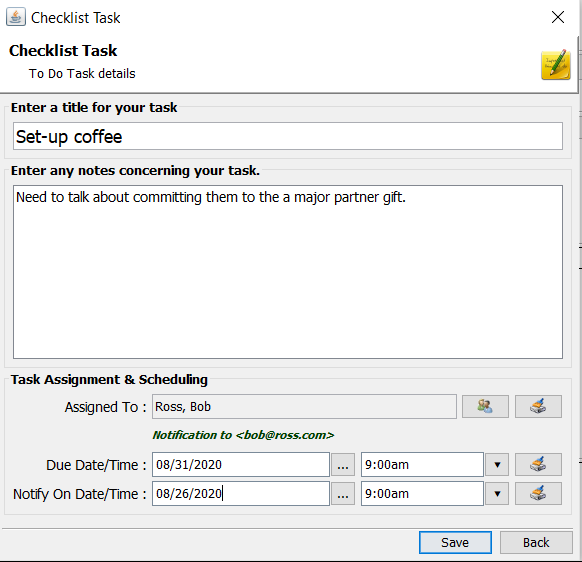
Enter a title and any notes that pertain to the task.
Tasks are nearly identical to the Reminders. They will automatically default to the assigned Solicitor, but can be changed to any user who might need to accomplish a task for the checklist. Compass-360 will send a reminder notification of the task on the date selected to notify.
As you accomplish tasks, you “check” them off the list and watch as the completion percentage increases!
Attachments
Letter of Intent? Important email? Newspaper article? You can attach any relevant documentation important to the card here.
A Completed Card
Once a card is completed, there will be more details that appear from the board-view. The purple images on the bottom of the blue outline indicate what card components (Activities, Checklist, etc.) have been attached to the card and how many.
