Event Guest Portal vs. Table Captain’s Portal
When a guest has or intends to purchase tickets for multiple people, there are two ways to collect the fellow attendees information, based on how the purchaser bought them: either the Event Guest Portal or the Table Captain’s Portal.
Purchasing Online
When an attendee purchases multiple tickets online (or any circumstance where they have guests attached to their attendee record as ‘Guest of’), they manage their guests using the Event Guest Portal. (You’ll still be able to manually edit guests from the Guest List in the Manage tab of the Event.)
The Event Guest Portal
This is their own, unique portal which allows them to edit their personal information, update or add their vaulted credit card, take an event-related questionnaire (if needed) and view their invoice or receipt.
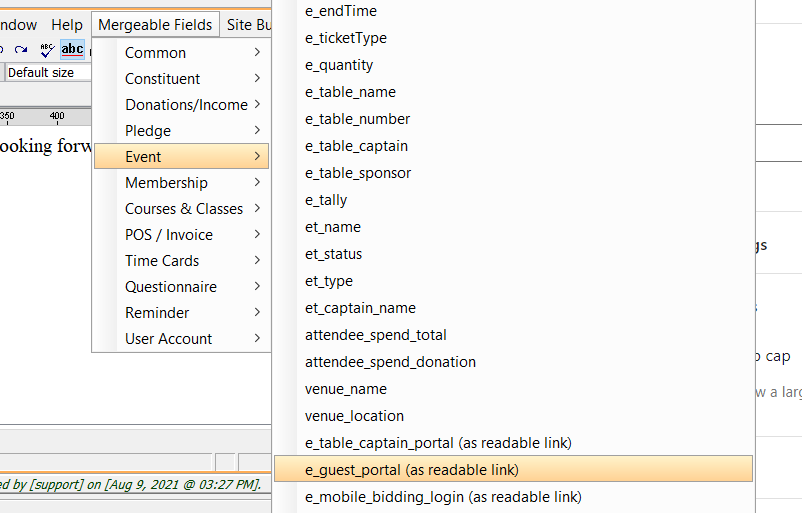
You can give an attendee access to their Event Guest Portal by using the Mergeable Field e_guest_portal (as readable link). This must be selected from within the email asset.

Once you have dropped the Mergable Field into the email asset, you’ll have the opportunity to change the name. It it a unique link and will adjust to direct each attendee to their own unique portal.
When they click it, they will arrive at their portal.
Important to note:
You can configure various elements of the Guest Event Portal, including messaging to attendees.
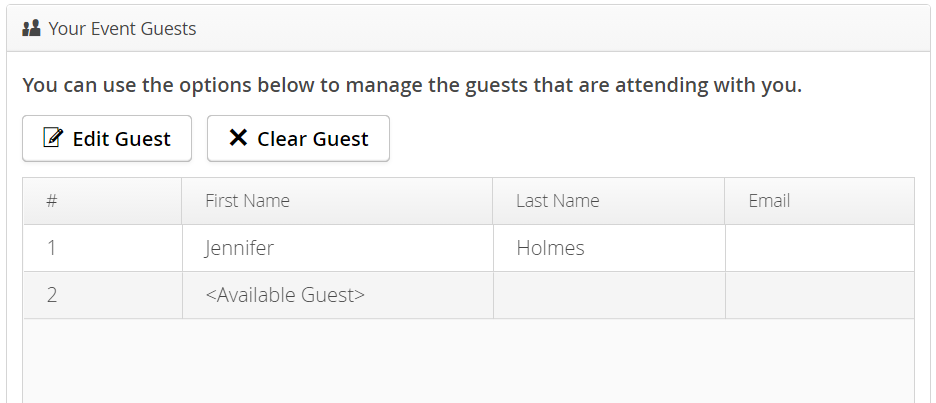
When a guest purchases multiple tickets, their guests will appear on their Guest Portal. If the purchaser has already entered the name of the guest, they will appear as so. If they have not, they will appear as <Available Guest>.
The purchaser can manage their guests here, but selecting the guest and then selecting either Edit Guest or Clear Guest.

Editing a guest allows the purchaser to add a guest. Clearing a guest will remove the guest and replace it with an <Available Guest> slot.
Managing Table Captains
If you have set up your event to include assigned seating and have a list of Table Captains who will be helping you fill tables, you can utilize the Table Captain Portal to help both you and the Table Captain invite and manage their guests.
After you’ve configured your Table Captain Portal, you’ll want to set up your Table Captains and then invite them to their portals. Table Captains can be added at any point through-out registration for your event, as long as you have a table configured.
The Table Captain Portal
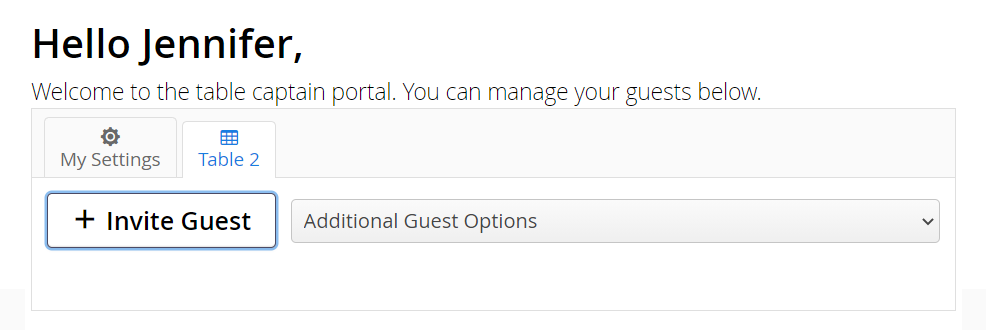
From their Table Captain’s Portal, your Table Captains can invite people to purchase tickets and sit at their table, but they can also send emails to their guests, update special instructions for individual guests, set their guests meal choice, or remove a guest from their table.
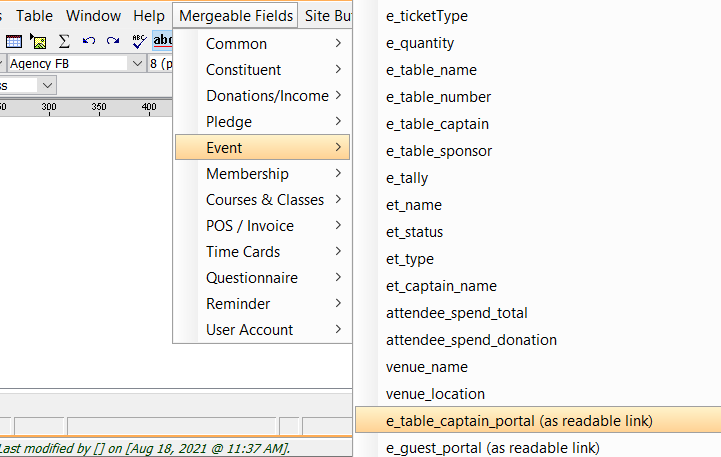
You can give a Table Captain access to their Table Captain Portal by using the Mergeable Field e_table_captain_portal (as readable link). This must be selected from within the email asset.

Once you have dropped the Mergable Field into the email asset, you’ll have the opportunity to change the name. It it a unique link and will adjust to direct each Table Captain to their own unique portal.

To invite, your Table Captains will select + Invite Guest. Depending on the settings, your captains can search for constituents in your database or select their own. The invitee will receive the email you have set in your Table Captain Settings:

Important to note:
The invitee email should include the Event Guest Portal link, otherwise the guest record will not be attached the Table Captain and the Table.
When the invitee clicks the Event Guest Portal, they will be taken to a portal where they can elect to confirm their attendance, decline the invitation, or decline the invitation with a donation to the organization:

The setting for your specific table will then determine the function of the portal for the invitee:


If the table is marked as Paid For : True, the invitee will not be will not be prompted to purchase a ticket, but will instead be taken to their Event Guest Portal to add their information and will appear in your Guest List and on the Table Captain Portal guest list.
If the table has been marked as Paid For : False, the invitee will be prompted to reserve a ticket.
Important to note:
All tables are by default, marked as Paid For : False.
If a guest will be attending, but needs to purchase their ticket, they’ll land on this page first:

After selecting Reserve Your Tickets, an overlay will run them through the ticket buying process as it would if they had registered through the Online Ticketing Portal, but will automatically assign the now attendee to the table of the Table Captain to which they were invited.
Emailing Guests
Additionally, from the Additional Guest Options, the Table Captains have various options to email their guests.
