Create Race Event
Create an event. When selecting Event Activities, make sure you select the Race activity.
Note: If you are selling tickets to your race, you still need to select the Ticketing & Seating activity and set up tickets as you typically would for an event.
Important to note:
If you need to gather additional information about your racers when they are purchasing tickets (like tee shirt size) you can do so by adding an attendee tag, and then selecting that attendee tag when you are setting up your race tickets. Create a new tag with the tag binding type of Attendee.
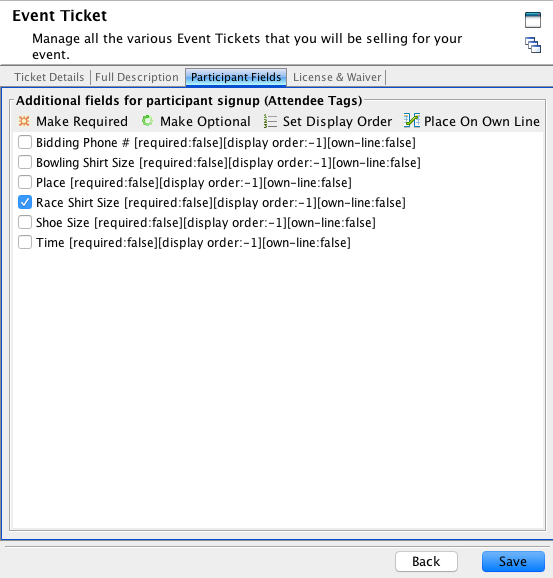
When setting up a ticket, go to the Participant Fields tab and select the attendee tag that you set up. Attendees will be asked their tee shirt size when purchasing a ticket to your race.

If you have a waiver for your race, you can add that on the License & Waiver tab.
Important to note:
A waiver will appear for each attendee that is being signed up. If you want only one waiver to appear for all attendees, return to Configuration > Ticketing & Meals > Ticketing Portal > Settings. Scroll and check the box for ‘Show Single Waiver.’

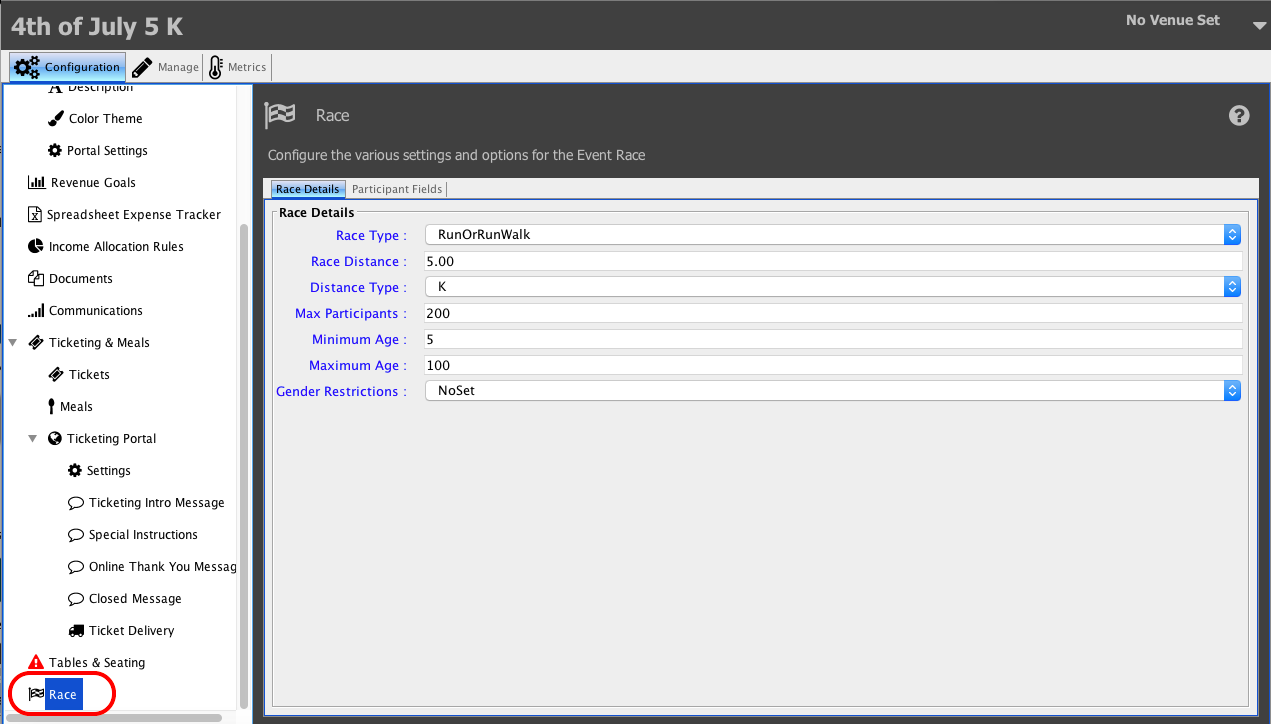
Once you have set up your attendee tags and added your race tickets, you can finish configuring your race. In Configuration, click on Race and enter details: Race Type, Race Distance, Distance Type, Max Participants, Minimum Age, Maximum Age, and Gender Restrictions.

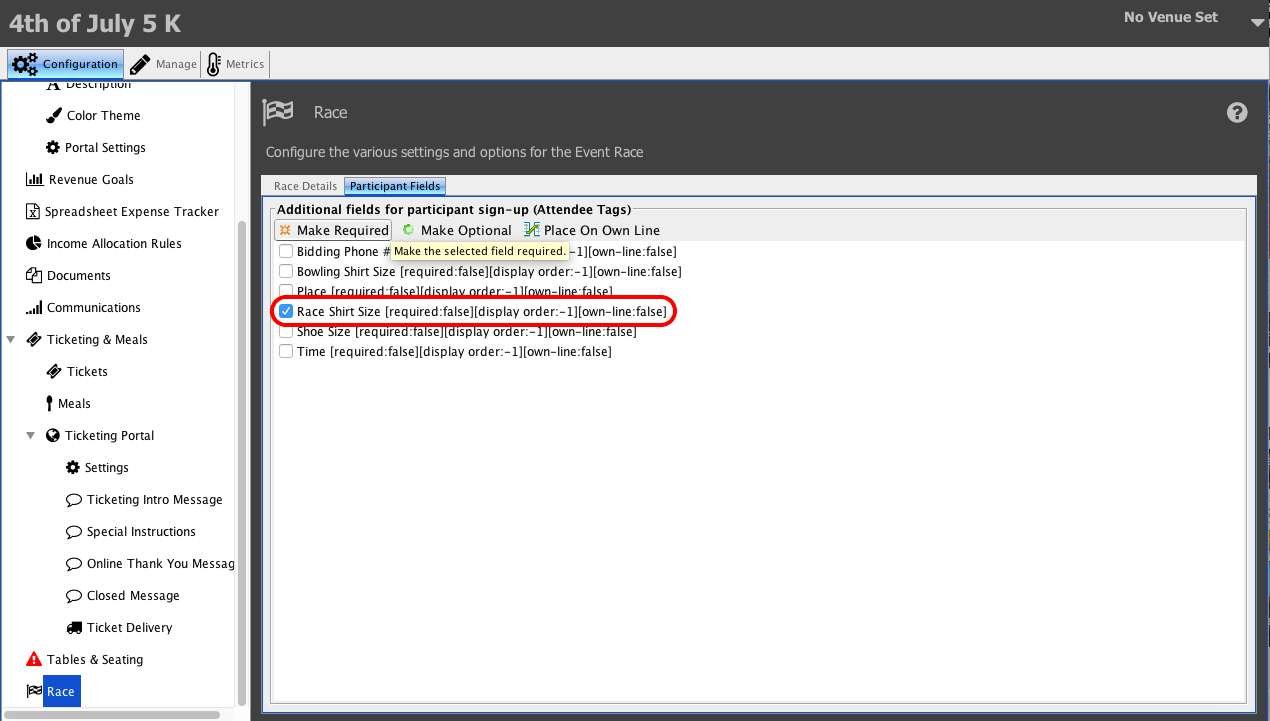
On the Participant Fields tab, select which Attendee tags you would like to present to your guests when they are purchasing tickets to your event.

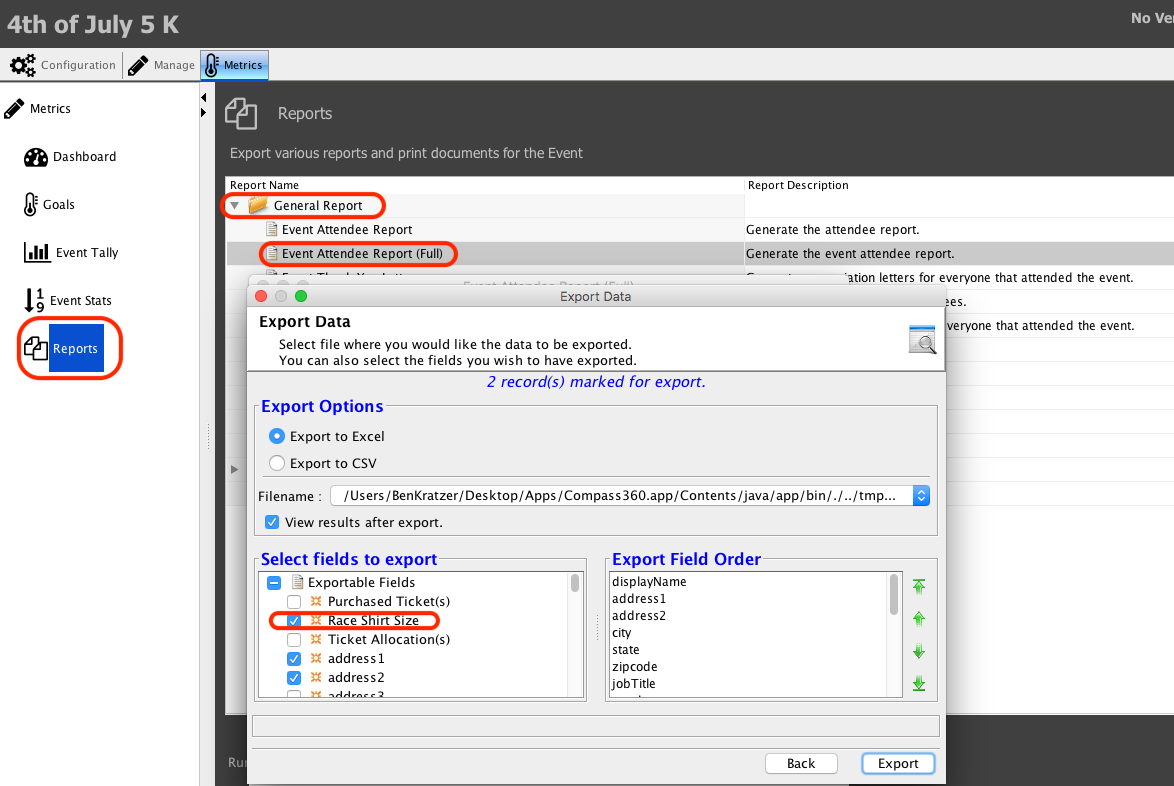
Once your guests have purchased tickets and have selected the participant field you set up (such as a race shirt size), you can run a report to see what they selected for their participant field.
Navigate to the Metrics tab in your event. Select Reports and in the General Reports section, choose Event Attendee Report (Full). Select the Participant Field you set up, and click Export. An Excel file will be opened and you will be able to see what each guest selected for the participant field.
