Issuing Event Refunds
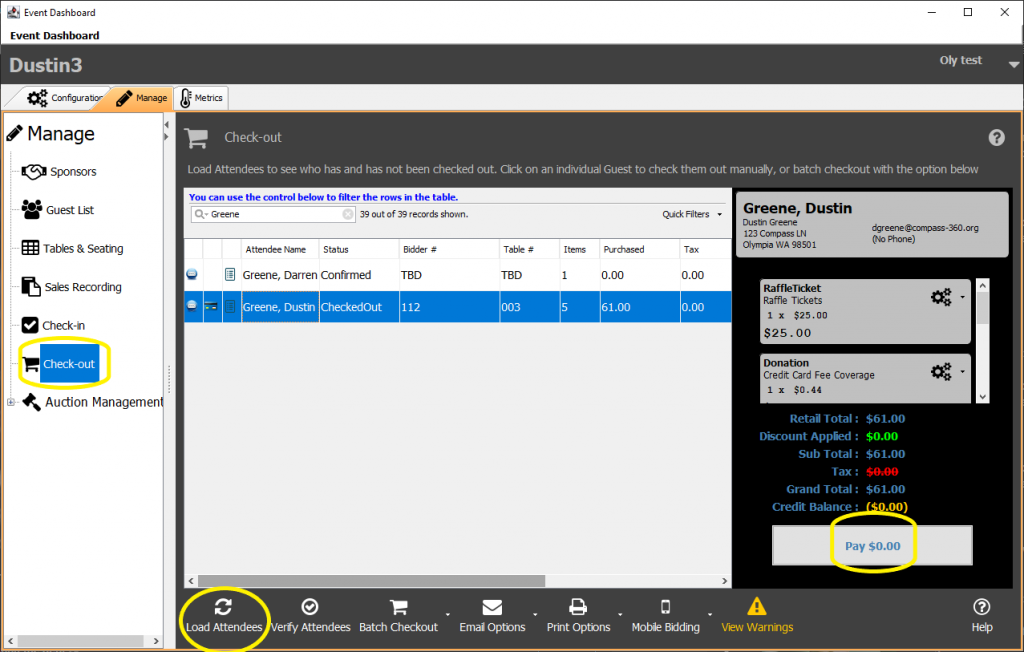
In the circumstance that you need issue an refund for income linked to your event, you can do so within the Checkout menu of the Manage tab of your event.
First, lselect Load Attendees from the bottom bar to curate the list of attendees, then locate and highlight the guest who needs to be refunded, then select Pay $__.__
Important to note:
When checking out or refunding attendees, you will always have to Load Attendees first. This pulls the most up-to-date list of attendees, in case there are still donation being recorded. If some sales recording coincides with check-out and an invoice is not correct, select Load Attendees to refresh the list.

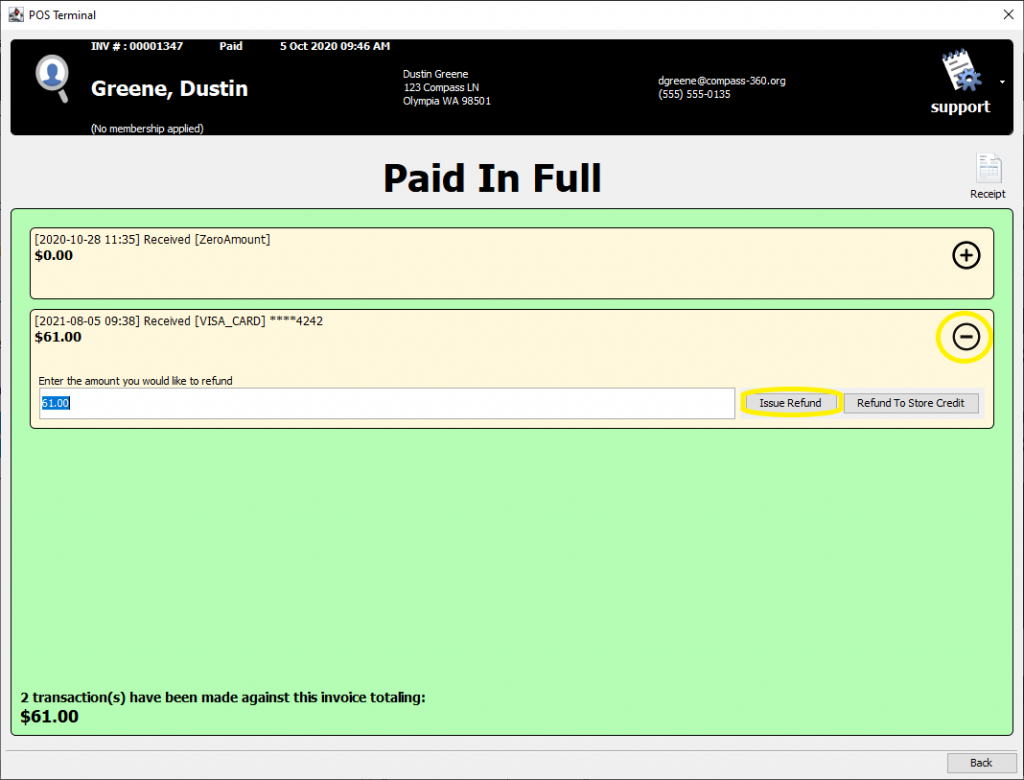
Select the + icon to reveal the refund menu, then set the amount of the refund you wish to issue, and select Issue Refund.

Important to note:
If a balance is due for the attendee, you will be taken to the Accept Payment menu, with the refund options on income records below the new payment options.
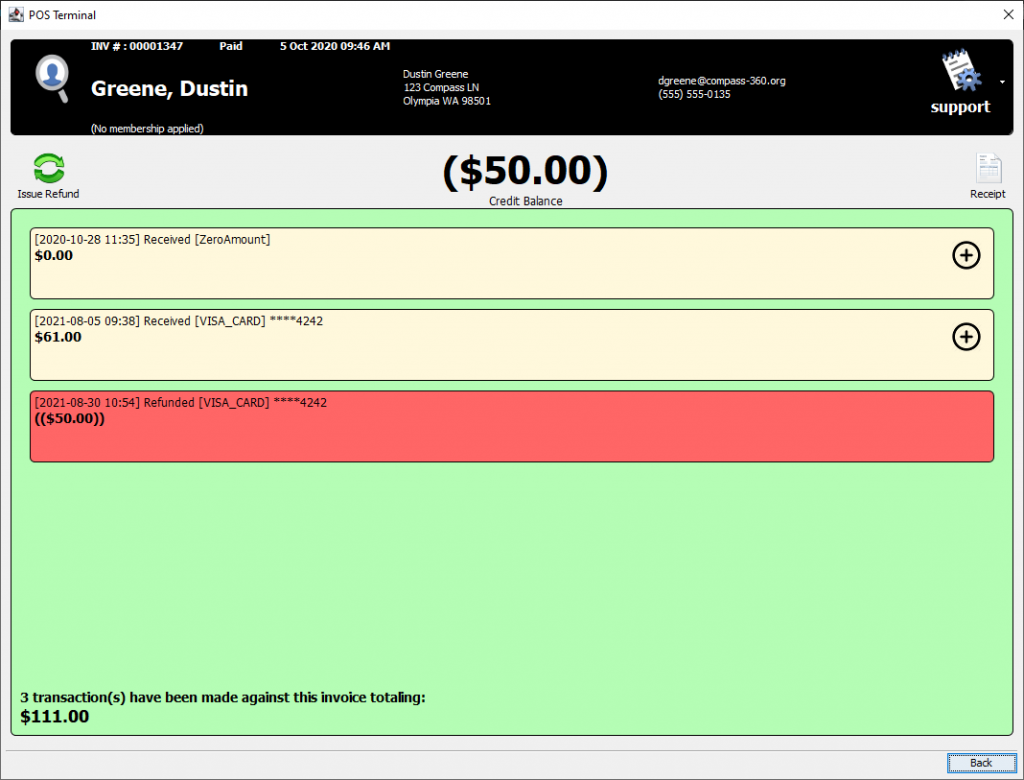
The refund will be presented in a new red record, where you can then review and close this menu.

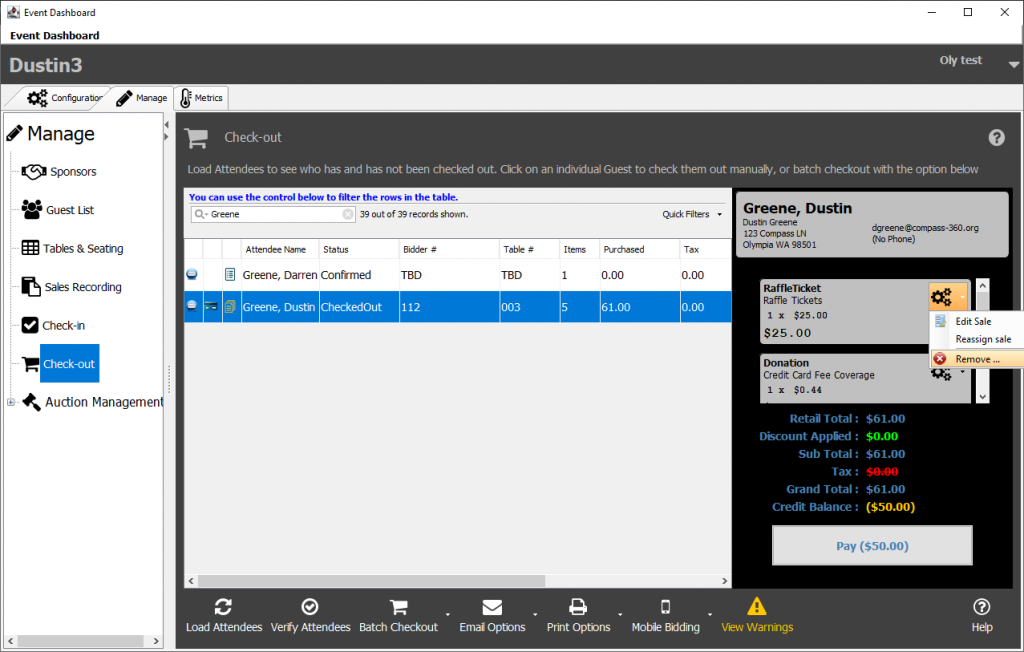
If you are not looking to take payment for the sale in a different way afterwards, it is also recommend to remove the sale you are refunding for, so that a balance doesn’t show as due. From the attendee record’s sidebar, find the item that you are removing and select the gears button.
From the drop down, select Remove…
