Setting Up Your Questionnaire Portal
Like all portals within Compass-360, you will have the ability to customize the look and feel of the portal that your constituents will access to complete and submit the questionnaire.
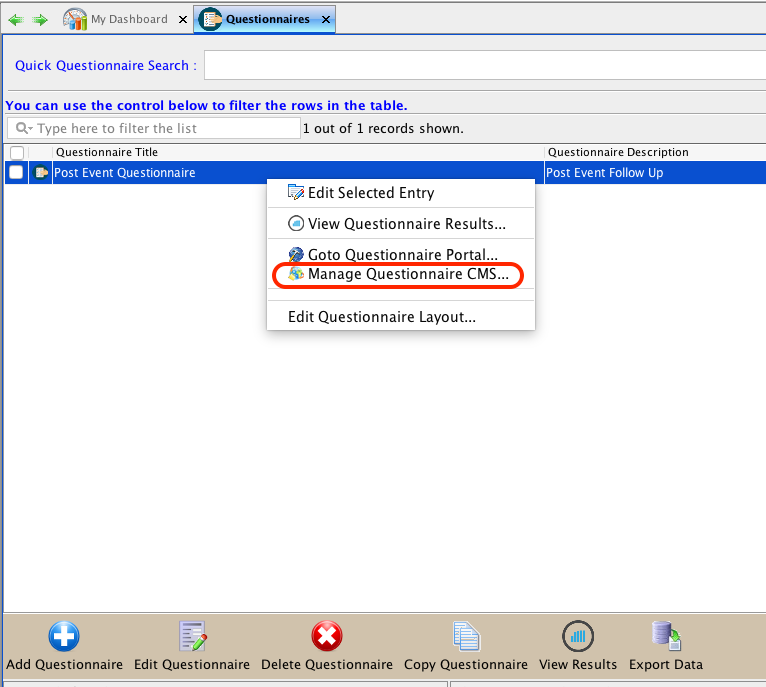
Search for and select the questionnaire from the Questionnaire module. Right click on the questionnaire and choose Manage Questionnaire CMS.

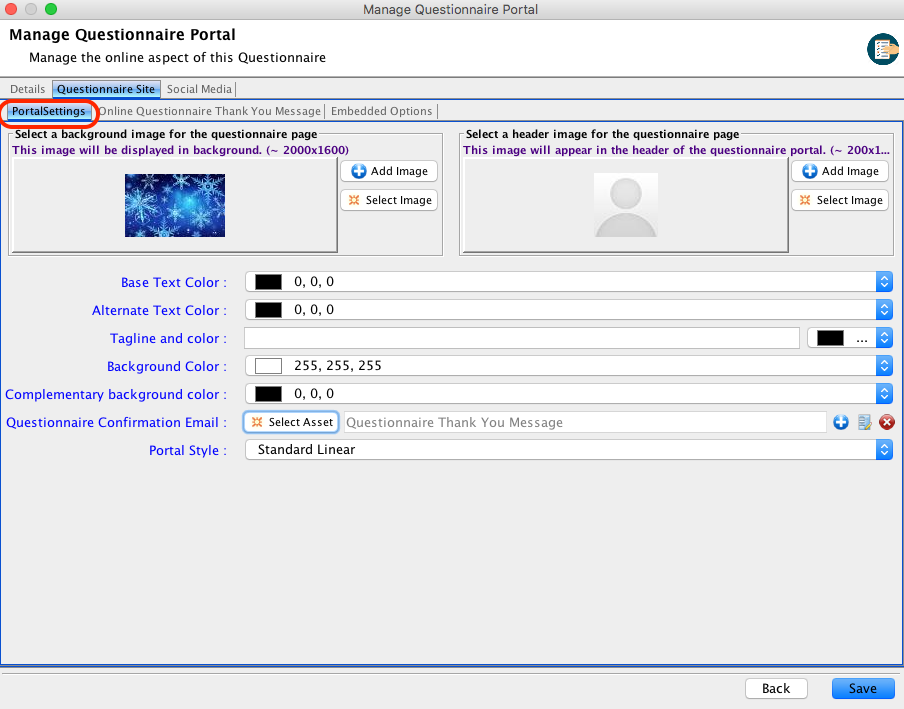
You will see the Manage Questionnaire Portal page. On the Details tab, you will have the ability to name the questionnaire and make the Questionnaire available online. Set this field to true to make the questionnaire available online.
On the Questionnaire Site => Portal Setting tab you will be able to set the look and feel for your portal.

On the Online Questionnaire Thank You Message tab you will be able to set up a Thank You Message that your constituents will see after completing the questionnaire.
On the Social Media tab, you will see the URL for your questionnaire so that you can share the questionnaire with your constituents.
You can select an image that will be used when posting to social media. You can also set up short URLs to use on different social media outlets. When you are finished setting up the questionnaire portal, click Save.
Tip: You can also customize the CSS styles of your questionnaire by clicking the Custom CMS button from the questionnaire editor window. This is for advanced users only.